How to Replace a Bathroom Vanity: Step-by-Step Guide
Replacing an old or outdated bathroom vanity is one of the easiest ways to give your bathroom a fresh new look without a full renovation. With the right tools, some planning, and a step-by-step approach. You can complete the project in a single day. If you follow this guide for how to replace a bathroom vanity.
The hardest part may actually be choosing the new vanity that best suits your space and style!
Below is a detailed guide to help you remove your old vanity and install a new one with confidence.
Tools and Materials You’ll Need
- Adjustable wrench
- Cordless screwdriver or drill
- Utility knife
- Bucket and rags
- Pliers
- Level and shims
- Carpenter’s pencil
- 2 ½” wallboard screws
- Caulk (tub-and-tile) and caulking gun
- Teflon tape
- New vanity, countertop, and faucet
Step 1: Shut Off Water Supply
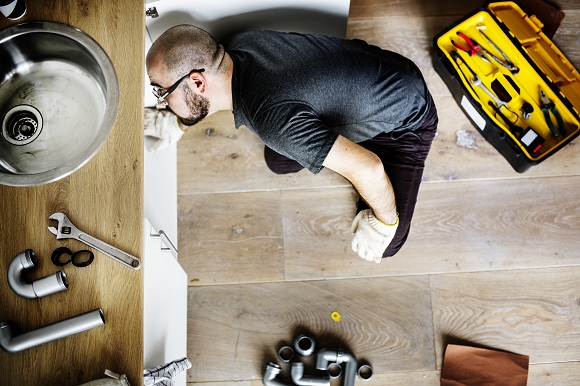
Start by turning off the water supply to the sink. There should be shut-off valves under the vanity—turn them clockwise until they stop. If they’re stiff, use pliers for extra grip.
Place a bucket under the sink to catch any water that drains out. Disconnect the supply lines from the faucet using an adjustable wrench. Then, remove the P-trap (the curved white pipe) and let any leftover water drain into the bucket.
Tip: If your shut-off valves are old or leaky, this is a great time to replace them.

Step 2: Cut the Caulk and Remove the Countertop
Next, use a utility knife to cut through the caulk where the vanity meets the wall. You may need to work all the way down the sides to the floor to break the seal completely.
Carefully lift off the countertop. This step often requires two people, especially if it’s a heavy stone or solid-surface top. Take care not to damage the walls during removal.
Step 3: Detach and Remove the Old Vanity
Use a cordless screwdriver or drill to loosen the screws that secure the vanity to the wall. Be careful not to strip the screws. Once they’re out, gently pull the vanity away from the wall.
Tip: If the vanity feels stuck, double-check for hidden screws or missed caulking.
Step 4: Prep the Wall and Floor
Before installing your new vanity, inspect the wall and floor area. Repair any damage, patch holes, and repaint if necessary. This is also a good opportunity to clean the floor and wall space that was hidden behind the old vanity.
Step 5: Locate Studs and Position the New Vanity
Set the new vanity in place and use a carpenter’s level to make sure it’s perfectly straight. Use shims under the base to correct uneven floors.
Locate the wall studs using a stud finder, then mark their positions slightly higher than the top of the new vanity. These marks will guide where you’ll secure the vanity.
Step 6: Secure the Vanity to the Wall
Once the vanity is level and flush against the wall, attach it using 2 ½” wallboard screws driven into the studs. Avoid over tightening to prevent damaging the vanity frame. To replace a bathroom vanity is easy, making sure you secure it is not. Do not miss this step.
Step 7: Install the Faucet and Vanity Top
It’s much easier to install the faucet before attaching the countertop to the vanity. Follow the faucet manufacturer’s instructions to mount it securely.
Run a bead of tub-and-tile caulk along the top edges of the vanity base, then carefully place the countertop onto it. Press down gently to create a secure seal.
Step 8: Reconnect the Plumbing
Reconnect the supply lines to the faucet and attach the P-trap to the drain. Use Teflon tape on threaded connections to prevent leaks and make tightening easier.
Pro Tip: Consider replacing the old P-trap with a new one. They’re inexpensive and it saves you from reusing a part that might be worn out.
Step 9: Caulk the Edges
Apply a thin, even bead of caulk along the edges where the countertop meets the wall. Smooth it with a caulk tool or a damp finger for a neat finish. This step is highly visible, so take your time.

Final Check
Turn the water supply back on and test the faucet and drain for leaks. Wipe down the vanity and countertop, and admire your refreshed bathroom.
Wrapping Up
To replace a bathroom vanity in a day is a manageable DIY project that can completely transform the look and function of your bathroom.
By following these steps, you’ll ensure the installation is clean, level, and watertight. With the right vanity choice, your bathroom will not only look better but also feel more functional for years to come.