How to Lay Tile in a Bathroom
It just takes some planning, perseverance and patience, however it is not too challenging when planning on laying a bathroom floor tile. You may be thinking of redoing the tile or flooring that is already in your bathroom, or you maybe you just want to make your home a little fresher and bright. There is some planning necessary when it comes to laying bathroom floor tile, however it is worth the effort, and by doing it yourself it will save you money.
So, to lay bathroom floor tile, you should follow the instructions below:
Things you will need: Ceramic tiles, Straight edge, Pencil, Tile adhesive, notched trowel, Tile cutter, Grout, Rubber float, Sponge and Caulk.
Laying Bathroom Floor Tile
- The old tiles should be firstly removed carefully from the bathroom floor with a chisel, take a note that this is the hardest part of how to lay tiles in a bathroom.
- Once the old tiles have been removed from the bathroom floor, it is important to make sure that the surface is clean and also smooth. Ensure there is no grease on the floor by simply using grease cleaner. Otherwise the tiles will not stick to it.
- The bathroom floor tile needs to be measured and cut. For large tiles, you can rent a wet saw, or tile cutter for smaller tiles, from a local home improvement store. Before cutting or applying the adhesive, make sure your floor measurements have been double checked and maybe even triple checked, because it is crucial that your measurements are correct.
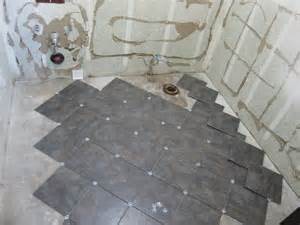
- As a ‘dry run’ or no adhesive, lay the tiles on the bathroom floor to give you the perspective of how they will look once laid, then pull them up when you are finished.
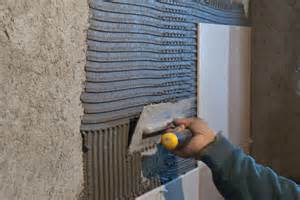
- The tile adhesive should be applied to the bathroom floor by using the notched trowel. Make sure you apply the adhesive evenly. It is recommended to work in a 2-3 foot area and the adhesive must be allowed to sit for a few minutes before setting the floor tile in it.
- The bathroom floor tile must be placed firmly into the adhesive, starting in the middle of the floor, be sure to leave spacers in-between the tiles.
- Once done, the floor tile needs to be allowed to set in the adhesive overnight.
- The floor tile spacers should be removed once the tiles are set and the adhesive is dry. Mix the grout according to the manufacturer’s directions.
- Apply the grout in-between the floor tiles at a 45 degree angle by using the rubber float. Take a wet sponge and wipe off any excess grout.
- Check the floor tiles for grout haze after about an hour, wipe them clean as necessary.
- The edges near the bathtub, sink, cabinets and toilet must be sealed with mildew resistant caulk.
- The last step, allow the bathroom floor tiles to cure for a week before use and then mop it clean.
Once these instructions have followed, you will find the answer of ‘How to lay tile in a bathroom’.


