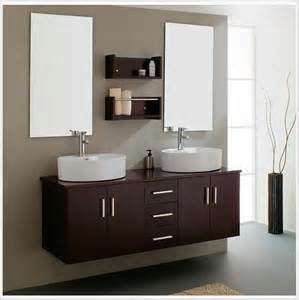
IKEA Bathroom Vanity Units
Ikea is a major manufacturer and supplier of bathroom furniture, including a wide range of vanities. The units may vary in design and style, however, the standard plumbing fittings and fixtures apply to all vanities.
Connecting drains and the water supply are the same throughout all styles.
How to Connect the plumbing IKEA Bathroom Vanity Units
Things you will need P-trap, Wrench, and Two standard braided water supply lines.
Connecting the Drain
- The drain stem will be located on the bottom of the sink. A plastic tube that is 1.25 inches in diameter is called the stem.
- The top of a P-trap fitting must be placed over the drain stem and to connect the two pieces, turn the nut clockwise over the stem. Tighten by hand as extra force may cause the plastic to break. Tools are not necessary for his step.
- The straight tailpiece of the P-trap should be connected to the roughed-in drain connection under the vanity.
- The nut on the P-trap’s tailpiece needs to be placed onto the end of the drain pipe and the nut must be turned clockwise until tight. This connects the P-trap to the drain.

Connecting the Supply Lines
- In order to shut off the flow of water to the house, the ball valve on the main water line must be turned clockwise 90 degrees.
- One end of a standard braided water supply line should be placed over the cold water valve under the vanity. Typically, the cold water is on the right side. Take a wrench and turn the nut on the supply line until tight.
- Another end of a standard braided water supply line should be placed over the hot water valve under the vanity. Typically, the hot water is on the left side. Take a wrench, and again, turn the nut on the supply line until tight.
- The other ends of the supply lines must be pulled up to the back of the sink. The line that’s connected to the cold water must be placed on the pipe threads under the right faucet handle, and the supply line that’s connected to the hot water must be placed on the left side.
- Take a wrench to turn both of the nuts on the supply lines clockwise until it tight. Both of the water lines will be connected to the vanity by this.
- In order to turn the water back on, turn the main water line 90 degrees counterclockwise. Both of the handles on the vanity faucet should be tested and also, make sure no water is leaking through the P-trap.