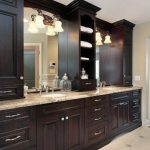
Custom Designed Bathroom Cabinets
Especially in bathrooms with limited space, corners are really hard to utilize efficiently. However, custom designed bathroom cabinets could be added to this limited storage capacity of a bathroom.
Custom built cabinetry that fits into an available corner, makes for a dual solution. The cabinet could hold cleaning supplies, toiletries, towels or personal care products that do not neatly fit elsewhere.
You will have given a room to store tall or large items, by a custom designed corner cabinets with 25 inches wide on three sides and 34 inches, on top of it. To make use of floor space underneath, it is much better you put the cabinet on legs.
So, to build custom designed bathroom corner cabinets, you should follow the instructions below:
Things you will need: Wood molding, Measuring tape, Pencil, Circular saw, Hack saw, Miter saw, Hammer, 4-by-8-foot sheet of 1-inch thick plywood, 2 pieces of lumber – 1-by-1-inch – 8-feet long, 1-inch medium density fiberboard (MDF), 2-inch finishing nails, 1-inch finishing nails, Sandpaper, Drill, ¼-inch screws, Four hinges, Cabinet door knob & hardware, Paint or stain and also Paintbrush.
Making the Pieces
- One piece of 1-inch plywood must be cut 24-by-34-inches once it has measured. Another 1-inch plywood piece must be cut 25-by-34-inches once it has measured. To make the pieces, you can use a measuring tape and circular saw.
- 8 ½-inch lengths should be measured and marked up the sides of the backs. These are where the shelves will be positioned.
- A 25-by-25-inch square of 1-inch plywood must be measured and cut. By using a straightedge and pencil, draw a line from each corner. This should yield four exact triangular parts. Take a circular saw then cut out the triangles, these are the four shelves.
- By using a hack saw, measure and cut eight 1-by-1-by-24-inch pieces of lumber. Two pieces will be used to support each shelf against the back of the cabinet.
- Take a circular saw then measure and cut two triangles of 1-inch MDF lumber 25-by-25-by-27-inches. These will serve as the top and bottom of the cabinet frame. The front edge of the top and bottom pieces is the long side of the triangles.
- Two pieces of molding should be measured and cut strips the height of the cabinet. Again, two piece pieces of molding should be measured and cut strips the width of the cabinet face from exterior corner to exterior corner. Cut the molding by using a hack saw. Make the moldings ends form right angles by simply cutting 25-degree angles with a miter saw.
- The last is the cabinet door, which you are required to measure and cut a 1-inch piece of MDF lumber 24-by-33 inches with the circular saw.
Assembly
Those pieces above just could be easily installed, once you have been figured it out or imagined. Once done, you will find that custom designed bathroom corner cabinets give you many benefits.
PICTURE: http://img.ehowcdn.com/article-new/ds-photo/getty/article/117/163/87585206_XS.jpg

