How to Silver Leaf Furniture with Simple and Easy Steps
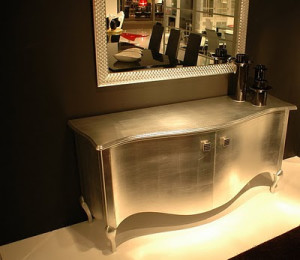
Silver leafing can be applied to furniture, mirrors, picture frames, and more. It can make your furniture more stunning and attractive. As long as you allow yourself ample time for the application process, you can learn to apply silver leafing to any furniture of your choosing. There are several steps to silver leaf a piece of furniture.
All the things you will need
- Furniture cleaner
- Drop cloths
- Water
- Sponge
- Low-tack painter’s tape
- 220-grit sandpaper
- 3-hour oil-based size adhesive
- Burnish sealer primer
- Gilder’s brush
- Silver leaf
- Gilder’s acrylic topcoat
Instructions for How to Silver Leaf Furniture
- In order to prevent damage and stain, use drop cloths to cover the surface of your work area.
- Use a cleanser that is designed for the furniture material and clean the piece of furniture that you are intending to silver leaf. Start with using 220-grit sandpaper to lightly sand the surface and remove any gouges and scratches. Use a wax-embedded tack cloth to remove any sanding residue. Then use a low-tack painter’s tape to line the area that you are gilding and protect the surrounding areas, while the gilding process.
- Brush your furniture with a layer of burnish sealer designed specifically for gilding, to prime the gilding area. As well as priming it hides any faults in the furniture, the sealer can make the furniture surface smooth enough to attach the silver leaf. There are three primer types, include red primer that creates a warm tone, yellow primer that creates a brassy tone, and gray primer for cooler tones. Allow the primer to dry for at least one hour.
- In the gilding area, you should apply the three-hour oil-based adhesive size. After about three hours, it will dry to a tacky state. Use a sponge to spread the size. The adhesive will cure into a state in which it remains not wet, but sticky for at least three or five hours. Tap the adhesive with your knuckles to test the state. When tapped with your knuckles, it should not seem to be rubbing off or disturbed.
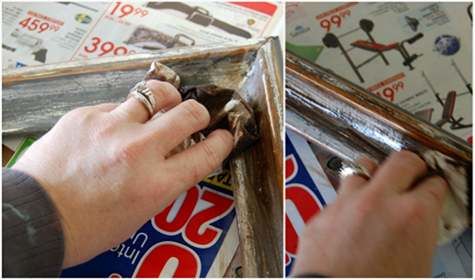
- Apply the silver leaf to the adhesive. With gentle pressure, carefully attach the silver leaf to the surface of the furniture. Lightly rub the back of the protective paper by using a gilder’s brush. Make sure to press every portion of the leaf onto the adhesive. And then, carefully peel back the protective paper.
- Use a gilder’s brush to rub the silver leaf and burnish the metal. check the furniture for any missing leaf sections, during the burnishing. Complete the coverage by placing individual pieces torn from a leaf sheet over them. Allow it to cure fully for at least one week.
- Use a protective acrylic topcoat to brush the gilded surface and use it with gliding. Before using your furniture, you should leave the topcoat for the manufacturer’s suggested drying time.
- Expose the clean gilded edge by removing the painter’s tape.

